Identifying Common Toilet Noises and Their Causes
Noisy toilets can be frustrating, but identifying the cause of the noise is the first step towards resolving the issue. Some of the most common toilet noises include:
Gurgling
A continuous gurgling sound following a flush typically suggests issues with the flush valve or flapper. A worn-out flush valve may not be sealing properly, allowing water to continuously leak from the tank into the bowl, an issue coming your toilet could do without. Replacing the flapper, which prevents water from continuously leaking into bowl, is often an easy and inexpensive fix.
Hissing
A foghorn-like noise upon flushing usually stems from a compromised seal, often resulting in a hissing or whistling sound. This could be due to a faulty connection between the tank and bowl, leading to noise coming from a damaged flush valve seal, or an issue with the fill valve. Securing loose connections or replacing damaged parts typically eliminates hissing noises.
Water Hammer
Unexpected loud banging in pipes after flushing generally results from water hammer, which happens when the flow of water is suddenly stopped. Installing water hammer arrestors onto supply lines can mitigate the shock and silence the noise.
Ghost Flushing
Flushing sounds when the toilet is not in use, known as ghost flushing, often indicate a faulty water supply mechanism. This is typically due to a defective fill valve causing the tank to refill intermittently and trigger ghost flushing. Replacing the fill valve kits solves the problem.
Minor toilet noises might seem negligible, but persistent or intense sounds warrant immediate attention as they could foretell serious plumbing problems. If unsure about diagnosing and rectifying concerning toilet noises, it is advisable to seek a professional plumber’s assistance.
Step-by-Step Guide to Troubleshooting a Leaky Toilet
Repairing a leaking toilet can often be handled through a systematic troubleshooting approach.
- Try to pinpoint the source of the water leak. Check whether a loud noise accompanies water leaking from the tank into the bowl, coming out from under the toilet base, or dripping down the outside.
- If the leak is coming from the tank, inspect the toilet flapper (or flush valve seal). Over time, flappers can wear out and leak. To eliminate leaks, swap out the flapper if it’s deformed, damaged, or fails to seal correctly.
- Check the toilet fill valve inside the tank. Confirm that the valve operates correctly and modify it if the water level is excessive. Replace the fill valve if it’s faulty.
- Examine the tank to bowl gasket. Secure any loose bolts or substitute the gasket if it shows signs of damage.
- Look at the water supply line and fittings that connect to the toilet. Secure the lock nut if loose, or replace if worn; both actions can fix leak issues.
- If water leaks between the tank and bowl, the tank bolts may be loose. Re-tighten tank bolts to stop leakage.
- When facing leaks at the toilet base, examine the wax seal between the toilet and floor flange. An improperly installed or damaged wax ring can cause leaks.
If you’ve attempted these troubleshooting techniques and the toilet persists to leak, enlisting a licensed plumber is recommended to properly diagnose and resolve the problem.
Checking for Cracks in the Toilet Bowl or Tank
Inspecting the toilet bowl and tank for cracks or damage is an important troubleshooting step when diagnosing a leaky toilet. Here are some tips for checking for cracks:
- Conduct a thorough visual inspection for fine cracks or chips on both the interior and exterior of the toilet bowl. Use a flashlight to illuminate all sides and angles.
- Place a few drops of food colouring in the tank, wait 15 minutes, and check if the bowl shows signs of coloured water, indicating a need for component replacement.
- Wipe the outside of the bowl and tank to remove any moisture before assessing for new leaks. Look for any new drips or moisture, which can cause your toilet to sustain unseen crack damage.
- Press tissue paper against suspected cracks. Water stains on the paper confirm a leak.
- Gently tap the tank and bowl with a screwdriver handle; the sound may reveal hollow, damaged areas.
- You’ll want to carefully inspect the area around the base, behind the bowl for pooling water that could indicate a crack.
Minor cracks in the toilet tank, a common problem, can potentially be sealed with epoxy putty. However, large cracks or extensive damage requires replacing the cracked component or the entire toilet. A professional can determine whether cracks in your toilet can be repaired or if a toilet replacement is needed.
Inspecting the Toilet’s Flapper, Flush Valve and Fill Valve
Inspecting the flapper, flush valve, and fill valve inside the toilet tank is an important troubleshooting step when diagnosing leaks or noise issues.
Check that the flapper works effectively during flushing and establishes a secure seal on the valve seat to prevent continuous leakage into the bowl.
Search for any fissures, distortion, or mineral deposits on the flapper. Determining why my toilet has a defective flapper that fails to form a tight seal is key to resolving the gurgling sounds as water seeps from the tank into the bowl. Replacing an old, worn-out flapper with a compatible replacement is a quick and inexpensive fix.
Examine the flush valve at the bottom tank where the flapper seals. Ensure the valve seat is clean and free of debris so the flapper can form a tight seal, therefore not making noise when sealing. Also ensure that the overflow pipe is properly aligned and unobstructed, which can affect how the flush button functions.
Inspect your fill valve toilet component, which is responsible for refilling the tank after a flush. Check for leakage from the uppermost valve, typically known as the fill valve seal. Make sure the float moves up and down appropriately with the high water level.
An issue with the fill valve seal or float can lead to ghost flushing, and may require replacing the entire valve mechanism with a compatible unit.
When acquiring new flappers or valves, visit your local hardware store to find models specifically designed for your toilet. Compatibility is important for ensuring optimal function and seal. With a bit of initiative and some DIY efforts, you can address many common toilet leaks and noises without requiring any plumbing service.
Adjusting the Toilet’s Water Level
Maintaining the appropriate water level in the toilet tank is crucial for proper functioning and minimizing noise. Here are some actionable insights to fix your toilet’s water level:
- Shut off the toilet’s inlet valve, typically located behind or next to the toilet.
- Flush the toilet to empty the tank. Ensure the tank is fully drained before making any adjustments to the water level.
- Refer to the water mark inside the rear of the tank, often a water line or fill line, to ascertain the correct level. When tank water level is correct, it is typically around 1 inch below this line.
- Locate the float cup or float ball on the fill valve inside the tank. It should sound like a quiet manoeuvre as you carefully bend the float rod down to lower the water level, or up to raise it. Adjust it so it’s not higher than 1 inch below the water line.
- Turn off the running water supply and then back on to allow the tank to refill. Make certain the fill valves halt the water flow at the appropriate level and don’t rise above.
- If needed, flush every few minutes and fine-tune the float rod position to achieve the right water level. Be patient while making adjustments.
Keeping the tank water at the proper level prevents ghost flushing, reduces water usage per flush, and minimises noise issues. Adjusting the fill valve float can also act as a quick and easy first step in resolving a noisy or frequently flushing toilet.
Sealing Leaks at the Base of the Toilet
If water is leaking from the base of the toilet, the likely culprit is a problem with the wax ring seal, which acts similarly to a supply valve, between the toilet and the floor flange. Here’s how to fix any issues with leaks at the toilet base:
- Turn water supply off at the valve and flush the toilet to empty the tank. Absorb any residual water pooling at the toilet base with a sponge.
- Remove the toilet by unscrewing the bolts on each side that anchor it to the floor. Lift the toilet tank lid straight up to access the floor flange beneath.
- Inspect the wax ring seal between the toilet and flange. If it is misshapen, cracked, or no longer creating a seal, it needs to be replaced.
- Check that the floor flange is level and sits flush with the finished floor. Use shims if needed to raise a sunken flange.
- Install a fresh wax seal ring centred over the floor flange, exerting even pressure as you lower the toilet, ensuring the seal bonds tightly with the water your toilet will contain.
- Reinstall and hand tighten the toilet anchor bolts to help fix toilet stability. Avoid over-tightening as this can crack the porcelain.
- Turn the water supply back on and check for any leaks. Apply caulk around the toilet base if needed.
Should leaks persist post wax seal replacement, a concealed crack in the toilet base or significant floor damage may necessitate expert repair. Contact a plumber for assistance diagnosing and addressing persistent leakage coming from the base of the toilet.
Quick Fixes for Common Toilet Noises
Various quick remedies are available for minor toilet sounds before considering professional plumbing help:
- Tighten any loose toilet seat bolts or hinges that may be causing squeaking or rattling noises.
- If seat-related noises occur, apply a silicone-based lubricant to the toilet seat hinges to reduce noise.
- Tighten the handle if it is loose and rattling when jiggled.
- Reset the water level if it’s too elevated, which can lead to noise and cause 'ghost flushing.'
- Clear obstructions around flapper to ensure a proper seal and prevent noise as the toilet makes peculiar sounds after flushing.
While these tips may temporarily solve some minor toilet noises, a persistently noisy toilet indicating larger issues may need professional repair.
Solving the Mystery of Ghost Flushing
Ghost flushing refers to the phenomenon where a toilet appears to randomly flush on its own, even when no one has recently used it. This mysterious flushing is typically caused by a malfunctioning fill valve inside the toilet tank.
The fill valve is responsible for refilling the tank with water after flushing. A worn out or faulty fill valve may fail to shut off completely once the tank is full.
This results in the fill valve adding small amounts of water continuously, causing the toilet to flush again when the water level gets high enough.
Replacing the flapper or rubber washer inside the fill valve kit is often all that’s needed to fix ghost flushing.
Turn off the main water supply to the toilet, you’ll need to empty the tank and remove the fill valve. Inspect the flapper and rubber washer for cracks or defects. You’ll need to replace the entire fill valve kit with fresh washers to prevent water from slipping through. Tighten all connections and turn the water back on to test for leaks.
Ghost flushing wastes gallons of water every day and drives up utility bills unnecessarily. With a simple valve inspection and repair, you can easily exorcise this phantom flusher and restore normal toilet function.
Ghost flushing refers to the phenomenon where a toilet appears to randomly flush on its own, even when no one has recently used it. This mysterious fl once the tank is full.
Stopping Sounds of Hissing or Gurgling
Hissingl>
A hissing noise your toilet making typically indicates water leaking due to a poor seal. Check the flush valve seal between the tank and bowl. Tighten connections or rake a tight seal will enable water to continuously descend into the bowl, creating a distinct gurgling sound.Make sure your water refill tube and overflow tube are not obstructed. Blockages can prevent proper drainage and cause gurgling.Clear debris around the flapper and flush valve seat to prevent it from making noise. A tight seal here prevents hissing from water slipping through.Adjust the water level if it’s too high. Excessive height can cause water to spill into overflow tube.Replacing flapper valves and adjusting/clearing components will typically solve hissing and gurgling. But if noises persist, contact your local professional plumber to inspect for larger issues like drainage blockages or pipe damage.
Understanding and Preventing Water Hammer
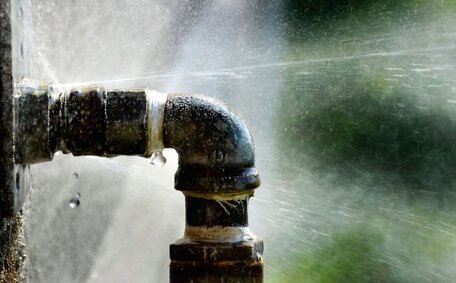
Water hammer refers to the loud banging or knocking noise that can occur in plumbing systems, including the sewer line, when a valve is suddenly closed, forcing the rapid stoppage of water flow. The shockwave created slams into the pipes, causing vibration and noise. Over time, water hammer can damage your plumbing pipes and joints.
Installing water hammer arrestors is the best way to prevent water hammer by regulating water pressure. Make sure arrestors are sized correctly and located at quick-closing valves. Make sure arrestors are sized correctly and located at quick-closing valves.
These devices contain air chambers, which are different to a tankless water heater system, that provide a cushion to absorb the shock, preventing noise and pipe damage.
Addressing water hammer right away protects your pipes and avoids costly repairs down the road. Stopping the hammering also provides peace of mind by silencing disruptive noises.
When to Call a Professional Plumber
While many minor toilet leaks and toilet noise issues can be fixed with basic DIY troubleshooting, visitors who use cookies on our site can easily find contact information for Gold Coast residents needing a professional plumber from Brighton-Le-Sands Plumbing.
A licenced plumber can provide assistance if:
- Problems persist after trying the troubleshooting steps.
- There are major leaks, flooding or water damage.
- You suspect the wax ring seal, toilet flange or anchor bolts are damaged.
- There are significant cracks or damage in the toilet bowl or tank.
- The toilet needs to be relocated or re-routed.
- You are uncomfortable completing repairs on your own.
Our experienced, licenced plumbers can accurately diagnose issues, complete repairs and installations, and cater to all your plumbing needs to ensure your toilet is functioning optimally. Don’t hesitate to call Brighton-Le-Sands Plumbing for reliable plumbing services in Sydney’s southern suburbs.


